Sunday, February 26, 2012

Writing my First Web Script for Alfresco

I started with the goal of creating a custom XML file which would be somewhat a "data extract" across a set of files which, in my case, will be located in the same folder. However, understanding how web scripts work and writing a functional web script that provides some meaningful output took me a bit longer than I expected (about 6 hours total, but now I know a lot about luceneSearch function and Alfresco AVM Store API), so at least I got to the point where I can list all the files in the folder and render this data in the HTML file.

The web script required 3 files to run: a definition file, a javaScript file which gets the folder details from the AVM store and a ftl (FreeMarker template) file which renders HTML. It is also possible to render output in JSON format (and other formats, I guess) but I did not get there yet. The files are called items.get.desc.xml, items.get.js and items.get.html.ftl.

I placed these files into the Alfresco "classes" path, in the subfolder "items" under "webscripts". The full path on my PC is

C:\Alfresco\tomcat\webapps\alfresco\WEB-INF\classes\alfresco\extension\templates\webscripts\items

And the full path to the actual files I'm interested in is

Y:\hostingitems\HEAD\DATA\www\avm_webapps\ROOT\items

where Y is the drive I mapped AVM repository to. "hostingitems" is the name of the web project where files were created. Currently I'm getting back all files in the folder, so if I want to sort out only XML files I'll need to additional logic.

items.get.desc.xml is a web script description file. Basically, it tells where the script is located and what it does.

<webscript>
<shortname>Get all items</shortname>
<description>Returns a list of items</description>
<url>/items</url>
<url>/items.json</url>
<url>/items.html</url>
<format default="json">extension</format>
<authentication>guest</authentication>
<transaction>none</transaction>
</webscript>

items.get.js returns the AVM store and the particular folder. The "s" variable is the web project name, and the "p" variable is the path to the folder. They can be passed to the web script as arguments rather than being hardcoded, but again that's a future "TODO" task.

script: {
var s = "hostingitems";
var p = "/www/avm_webapps/ROOT/items/";

// get avm node
var store = avm.lookupStore(s);
if (store == null || store == undefined)
{
status.code = 404;
status.message = "Store " + s + " not found.";
status.redirect = true;
break script;
}
// get items data folder
var itemsNode = avm.lookupNode(s + ":" + p);
if (itemsNode == undefined)
{
status.code = 404;
status.message = "Could not find items folder. Path:" + p + " Store:" + s;
status.redirect = true;
break script;
}

// set store and folder in the model
model.store = store;
model.folder = itemsNode;
}

items.get.html.ftl is a template that renders html. Dead simple, it only loops through the folder contents and populates some settings of the files into an html table.

<#assign datetimeformat="EEE, dd MMM yyyy HH:mm:ss zzz">
<html>
<head>
<title>Items in folder: ${folder.displayPath}/${folder.name}</title>
</head>
<body>
<p><a href="${url.serviceContext}/sample/avm/stores">AVM Store</a>: ${store.id}</p>
<p>AVM Folder: ${folder.displayPath}/${folder.name}</p>
<table>
<#list folder.children as child>
<tr>
<td>${child.properties.creator}</td>
<td>${child.size}</td>
<td>${child.properties.modified?datetime}</td>
<td>
<a href="${url.serviceContext}/api/node/content/${child.nodeRef.storeRef.protocol}
/${child.nodeRef.storeRef.identifier}/${child.nodeRef.id}/${child.name?url}">${child.name}
</a>
</td>
</tr>
</#list>
</table>
</body>
</html>

Now when my files are ready I can go and check the Alfresco web scripts by logging in and naivgating to
http://localhost:8080/alfresco/service/index

I currently have 463 web scripts.

Web Scripts Home

Browse all button shows me the list - fortunately the user defined web scripts are on the top so I do not have to scroll the whole list.

Web Script Details

This data obviously comes from my description file. This would be displayed even if the script itself results with an error. For example, if I make a syntax error in my javaScript and navigate to the alfresco/service/items.html, I will get an error message.

Web Script Error

Fortunately, the error messages have been mostly helpful - in this case, it's just a missing closing bracket after an if statement. So, I fix it, save js file, go back to web scripts page, press "Refresh web scripts" to pick up my changes and try again. And there's my list of files generated by a web script.

Web Script Results

Reference:

Alfresco Developer Guide

by . Also posted on my website

Thursday, February 23, 2012

Amusing

Advance programmed sample processing system and methods of biological slide processing

"A local area network for this type of system may also include features such as but not limited to: an Ethernet element, a token ring element, an arcnet element, a fiber distributed data interface element, an industry specification protocol, a bluetooth-based element (named but not contemporary to King Harald Bluetooth of Denmark in the mid-tenth century!), a telecommunications industry specification" ...

by . Also posted on my website

Tuesday, February 14, 2012

Restricting Access to Content in Alfresco

A small exercise in restricting access to certain actions with content.

Create at least two users. To create users, login as admin (the only account that has the rights to manage users). Navigate to Company Home -> User Homes. In the top bar, select "Administration Console".

Link to Administration Console

In the Administrative Console, select Manage System Users. In the top ride part of the screen, select "Create User". The required fields are First Name, Last Name and Email. Other fields are optional. Select "Next".

New User Wizard

Assign the username and password and select Finish. Create another user in the same manner. Now we can assign these users to different roles and check if it makes any difference. Navigate to Company Home -> Web Projects. Select a Web Project. From Actions, select “Invite Web Project Users”. On the “Invite Web Project Users” screen, add one user as the Content Contributor, and another as a Content Reviewer. Click “Next”.

Invite Web Project Users

No need to sending emails at this stage. On the "Notify Users" screen, leave default option as "No" and select "Next". On the summary screen, review the information, use "Back" to make changes or select "Finish". Note that there are now 3 users working on the project: admin and the two users who were just invited.

Staging Sandbox

Log off as admin and log in as the Content Reviewer. Navigate to Company Home -> Web Projects, select the web project where user was invited. Note that the “Web Forms” section is not present in the user sandbox, preventing him from adding or modifying content to the web project.

No Modified Items

Log off and log on as the Content Contributor. Navigate to the same project and verify that the “Web Forms” section is present in the sandbox and the user can add and modify content.

by . Also posted on my website

Sunday, February 12, 2012

Assigning a Workflow to the Web Form

Alfresco includes two types of workflow out of the box. The Simple Workflow is content-oriented, and the Advanced Workflow is task-oriented. Out of the box, the Simple Workflow has only two steps, one for approval and one for rejection.

Here is one way to assign a Simple Workflow to the Web Form, if it is associated with a Web Project.

Navigate to Company Home -> Web Projects, select the web project and choose Actions -> Edit Web Project Settings in the top right part of the screen. Select "Next" until you get to the "Configure Web Forms" screen. If the web form does not have a workflow associated with it, a small exclamation mark will be displayed.

Workflow not Configured

Select "Configure Workflow". On the "Configure Workflow", use "Search" option to display users. Choose a user which will be reviewing and approving content and select "Add to List".

Add Users to Workflow

Click "OK" on the right to complete the workflow configuration. The exclamation mark should no longer be displayed. Select "Next" to get to "Configure Workflow" screen. There should only be one workflow available, "Web Site Submission". Select "Add to list". Once again, the exclamation mark will be displayed.

Configure Web Project Workflow

Use the "Configure Workflow" in the same way as was done for a web form. Select "Finish" to save changes. Now it is time to create some content and check what the workflow does. On the Web Project screen, select "Create Content" against the web form for which the workflow was just configured. Create some content and on the last screen check the "Submit these X files when wizard finishes". Select "Finish". (I'm not exactly sure if that's the correct way to go - did I have to configure workflow twice, first on the web form and then on the web project? Maybe not. I think, the way to avoid it is to add workflow at the time of creation, both on a project and a form. That would likely be the best practice.)

Submit Items When Wizard Finishes

Now the wizard asks to provide some more details, so fill in the Label and Description for the items being submitted. Select "OK" to submit.

Submit Items

Next, log out from the user who created content and log in as a user who was specified as a Content Manager. "My Alfresco Dashboard" will be displayed, where under "My Tasks To Do" the task to review the submission should appear. Select "Manage Task" to review the submission.

My Tasks To Do

Let's first reject the submission. Provide the user with some helpful comment and select "Reject" on the right.

Review Workflow Task

Now you should be back on the "My Alfresco Dashboard" and you can notice that there are no more entries under "My Tasks To Do". This means that the hard job of the content reviewer is done for now. Log off as this user and log back on as the content creator. Now you'll be on the "My Alfresco Dashboard" and you'll see that you have a task to do, which has a "Rejected" type. Use "Manage Task" to fix this! On the "Manage Task" screen you can see joe's comment, so select "Edit" icon to modify the content. Make the changes and save them. Now on the "Manage Task" screen, select "Resubmit for Review" on the right. Logout as this user and log back on as the content reviewer. There's a task now in the "My Tasks To Do", with a small (2), which tells me how many times the content was submitted. Choose "Manage Task".

My Tasks To Do - 2

Now the content looks better (let's at least assume that) and the reviewer selects "Approve". Again, the task is gone - log out one last time and log back on as the content creator. There are no more tasks too, but navigate to the Company Home -> Web Projects, select the web project and expand "Recent Snapshots". Now there is the content there which can be deployed, as described in a previous post - feel free to deploy if you wish.

Recent Snapshots

by . Also posted on my website

Thursday, February 9, 2012

Simple Reporting with Alfresco

Basic static reports can be generated in Alfresco by using XSLT (or FreeMarker) to build the static pages. As an example, I have created a simple list of all items generated by a web form. One approach would be to create a separate web form for this task. In this case a list can be generated an any time by using this form to create content. The approach I used requires slightly less work (no new web form is created), but also slightly less flexibility (an index is created only when a new item is created). For a start, I created a web form that adds simple items, using the following XSL file:

<?xml version="1.0" encoding="UTF-8"?>
<xsl:stylesheet version="1.0" xmlns:xhtml="http://www.w3.org/1999/xhtml"
xmlns:xsl="http://www.w3.org/1999/XSL/Transform"
xmlns:fn="http://www.w3.org/2005/02/xpath-functions"
exclude-result-prefixes="xhtml">

<xsl:output method="html" encoding="UTF-8" indent="yes" doctype-public="-//W3C//DTD XHTML 1.0 Transitional//EN" doctype-system="http://www.w3.org/TR/xhtml1/DTD/xhtml1-transitional.dtd" />

<xsl:template match="/">
<html xmlns="http://www.w3.org/1999/xhtml" xml:lang="en" lang="en">
<head>
</head>
<body>
<div id="main_content">
<h1>Item ID: <xsl:value-of select="/item/id"/></h1>
<p>Item Name: <xsl:value-of select="/item/name"/></p>
<p>Expiry Date:<xsl:value-of select="/item/expiryDate"/></p>
</div>
</body>
</html>
</xsl:template>
</xsl:stylesheet>

Next step is to create an XSL template to redner an HTML list of items. This is the simplest I could come up with:

<?xml version="1.0" encoding="UTF-8"?>
<xsl:stylesheet version="1.0" xmlns:xhtml="http://www.w3.org/1999/xhtml"
xmlns:xsl="http://www.w3.org/1999/XSL/Transform"
xmlns:fn="http://www.w3.org/2005/02/xpath-functions"
exclude-result-prefixes="xhtml">

<xsl:output method="html" encoding="UTF-8" indent="yes" doctype-public="-//W3C//DTD XHTML 1.0 Transitional//EN" doctype-system="http://www.w3.org/TR/xhtml1/DTD/xhtml1-transitional.dtd" />

<xsl:template match="/">

<xsl:variable name="itemList" select="alf:parseXMLDocuments('item', '/items')"/>

<html xmlns="http://www.w3.org/1999/xhtml" xml:lang="en" lang="en">
<head>
</head>
<body>
<ul>
<xsl:for-each select="$itemList">
<xsl:variable name="selectedVar">
<xsl:choose>
<xsl:when test="position() = 1">selected</xsl:when>
<xsl:otherwise>leaf</xsl:otherwise>
</xsl:choose>
</xsl:variable>
<li class="{$selectedVar}">
<xsl:variable name="fileNameFixed">
<xsl:call-template name="fixFileName">
<xsl:with-param name="fileName">
<xsl:value-of select="@alf:file_name" />
</xsl:with-param>
</xsl:call-template>
</xsl:variable>
<a href="{$fileNameFixed}"><xsl:value-of select="id" /><span> <xsl:value-of select="name" /></span></a>
</li>
</xsl:for-each>
</ul>
</body>
</html>
</xsl:template>

<xsl:template name="fixFileName">
<xsl:param name="fileName" />
<xsl:value-of select="concat(substring-before($fileName, '.xml'), '.html')" />
</xsl:template>
</xsl:stylesheet>

The template calls parseXMLDocuments function of AVMRemote API to get a list of items. Note the parameters. First parameter is the name of the web form that was used to generate items. If the parameter does not match to the web form name exactly, it is likely that an empty list will be generated. I spent some time struggling with that! The second parameter is just the location where to get items from. As I understand, it is optional and the whole repository may be searched if the parameter is omitted. Next the template goes through each item and generates a link to it. The fixFileName function only replaces the file extension.

When the template is complete, navigate to Data Dictionary > Web Forms > Edit Web Form (for the desired web form). Select "Next" to get to the Configure Templates dialog. Locate the saved template and set the correct output path, i.e. “/${webapp}/items/index.html”. Select "Add to list", then "Next" and "Finish". As the result, the web form will create an "Item" each time it is used. Also, it will recreate the "index.html" page, which will now contain the newly added item.

This is the sample HTML generated by the web form.

<!DOCTYPE html PUBLIC "-//W3C//DTD XHTML 1.0 Transitional//EN" "http://www.w3.org/TR/xhtml1/DTD/xhtml1-transitional.dtd">
<html xmlns="http://www.w3.org/1999/xhtml" xmlns:fn="http://www.w3.org/2005/02/xpath-functions" xml:lang="en" lang="en">
<head />
<body>
<ul>
<li class="selected"><a href="Item7.html">7<span>amazing achievement</span></a></li>
<li class="leaf"><a href="Item6.html">6<span>a real item</span></a></li>
<li class="leaf"><a href="item8.html">8<span>Improvement</span></a></li>
</ul>
</body>
</html>

This is the simples example I managed to come up with. Another reporting option, which is more advanced, is to writh web scripts to define a REST API for the Alfresco database content. Then the API is used to create, read and delete data in the backend repository and return responses in HTML, XML or JSON.

Reference:

Alfresco Developer Guide

Web Content Management Roles

by . Also posted on my website

Monday, February 6, 2012

Web Form and Web Project with Alfresco

Alfresco uses the Web Forms to capture content and store it as XML in the repository. Web forms allow creation of structured XML based on the schema definition (XSD). An XSLT can be associated with the Web Form to convert Alfresco web form XML into other formats. Creating a web form is a good starting point for creating web content.

Run Alfresco Explorer, login as admin and navigate to Company Home > Data Dictionary > Web Forms. Select Create Web Form from the Create menu. The Create Web Form Wizard will start.

I'll use this web form to create "items". The item has an id, a name and an expiry date. I prepared a simple XML schema definition that I will provide to the web form so it could later give me a user friendly way to create content.

<?xml version="1.0"?>
<xs:schema xmlns:xs="http://www.w3.org/2001/XMLSchema"
xmlns:alf="http://www.alfresco.org"
elementFormDefault="qualified">

<xs:element name="item">
<xs:complexType>
<xs:sequence>
<xs:element name="id" type="xs:integer"/>
<xs:element name="name" type="xs:normalizedString"/>
<xs:element name="expiryDate" type="xs:date"/>
</xs:sequence>
</xs:complexType>
</xs:element>
</xs:schema>

I'm providing this schema on the Web Form Details. The "Output path pattern" defines where the items will be created in the project structure. /${webapp}/items/${name}.xml will create xml files in the "items" folder.

Alfresco stores the item details in the xml form, but can easily render it into html if I provide a template. I prepared a very simple template.

<?xml version="1.0" encoding="UTF-8"?>
<xsl:stylesheet version="1.0" xmlns:xhtml="http://www.w3.org/1999/xhtml"
xmlns:xsl="http://www.w3.org/1999/XSL/Transform"
xmlns:pr="http://www.my.com/corp/pr"
xmlns:fn="http://www.w3.org/2005/02/xpath-functions"
exclude-result-prefixes="xhtml pr fn">

<xsl:output method="html" encoding="UTF-8" indent="yes" doctype-public="-//W3C//DTD XHTML 1.0 Transitional//EN" doctype-system="http://www.w3.org/TR/xhtml1/DTD/xhtml1-transitional.dtd" />

<xsl:template match="/">
<html xmlns="http://www.w3.org/1999/xhtml" xml:lang="en" lang="en">
<head>
</head>
<body>
<div id="main_content">
<h1>Item ID: <xsl:value-of select="/item/id"/></h1>
<p>Item Name: <xsl:value-of select="/item/name"/></p>
<p>Expiry Date:<xsl:value-of select="/item/expiryDate"/></p>
</div>
</body>
</html>
</xsl:template>
</xsl:stylesheet>

I could choose to store XML and HTML files in separate locations, but for now I would not bother. After filling in the details, I need to press "Add to list" so my template is saved with the form.

I could create a workflow for review and approval of the changes, but for now I'll leave it till later and select "No not now" on the "Configure Workflow" screen. Last screen is just a review of the details and after selecting "Finish" my web form is created.

Next I need a web project that will utilize my form. Navigate to Company Home > Web Projects and select Create Web Project in the Create menu. The Create Web Project Wizard will start.

Fill in the details, fields are really freetext and Use as a template is not required. In step two, choose "Create a new empty Web Project". In step three, add a deployment receiver. I will be using my local PC, hence the 'localhost'. I also found out that I can not make the receiver to work unless I use port 50500 and specify a Target Name of 'avm'.

In step four, there should be at least one web form listed in "Select Web Forms" - the one created earlier. Select "Add to list" to associate the web form to the web project. Further steps are about workflow and users - something that can be configured later. After the last step, select "Finish" and the web project is created.

All is ready to generate some content for the project. Click on the name of the project and you will see the sandboxes for the project. There should be at least two: Local sandbox of the user who's logged in and the Staging Sandbox. The user sandbox should now have a web form which has an action "Create Content". That's what I'll do.

I'll create my first item, so I'll call it item1 and specify Type as Content and Content Type as xml. Next step gives me a way to enter content details - based on my XSD, Alfresco gives me a smaller box to enter an integer, a longer box to enter a string and a date picker for a date. How cute.

When I'm done, item1.xml and item1.html are created. I can view them if I choose "Browse Website" and navigate to "items" folder.

Here's how my XML and HTML files look like - more or less the way I expected them to be.

by . Also posted on my website

Friday, February 3, 2012

Installing Alfresco

A fully functional trial version of Alfresco can be downloaded from the company website. Somewhat confusingly, there are two separate links, for Document Management and for Web Content Management, but the downloads seem to be identical. It appears that the difference may be in the modules that are installed if "Easy" option is used.

Additionally, the Community version of the product is freely available. Both Community and Enterprise versions are Open Source, but Enterprise also offers support and certain extensions. There is a comparison of the functionality, but it is fairly high-level.

I'm using a local PC as both a server and a client for my evaluation experiments. The installation process was fairly straightforward.

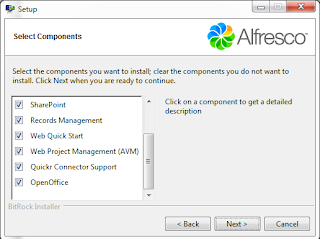
  • Select language
  • Select "Advanced" installation type
  • Check all boxes
  • Leave all the settings default on next screens up to the admin password screen
  • Create admin password
  • Leave all the settings default on next screens up to the service startup configuration
  • Select "Auto" option – configure servers to start automatically
  • Wait for the installation to complete


"Advanced Install" options

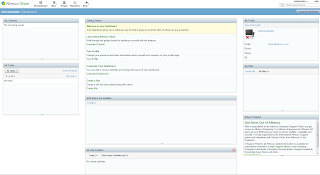
Alfresco Share

Alfresco Explorer

After installation, the Alfresco Share is located at http://127.0.0.1:8080/share/page/user/admin/dashboard and Alfresco Explorer at http://127.0.0.1:8080/alfresco.

Share and Explorer is a separate topic, which I do not yet understand thoroughly - the Explorer provides means to create, modify and publish content. All my experiments so far have been done using Explorer. The purpose of Alfresco Share appears to be team collaboration so it may become useful when (and if) at some stage more than one person will be working on the content.

References:

Open Source Web Content Management in Alfresco by . Also posted on my website

Thursday, February 2, 2012

Understanding Alfresco

I've just started at the new role and the first 'real' task I've been given was to identify if the Content Management System is suitable for storing some data which was previously stored in the database. This is quite a new concept for me and there are a lot of questions to answer. User friendly display? Editing and saving? Versioning? Approval? Trail of changes? Referential integrity?

What I need out of an CMS is

  • Ability to store data in XML form
  • Ability to display data in a user-friendly manner
  • Ability to edit and save data
  • Ability to apply scripts or rules on check-in of data
  • Keeping an audit trail of changes made to data
  • Version control and options available to keep release history and versioning of documents
  • Ability to keep multiple edits or branches of documents
  • Ability to extract data
  • Ability to apply a workflow to a document such as make a review mandatory before the document is released

As an example of a CMS, we chose Alfresco. Alfresco is an enterprise content management system that includes content repository, an out-of-the-box web portal framework, a CIFS interface that provides file system compatibility, a web content management system and a workflow.

There are two different repository implementations within Alfresco. They are DM store and WCM store (Data Management and Web Content Management). They are not equivalent in terms of functionality.

WCM is built on top of the core products and adds some functionality. However, it was developed in such way that it created a separation between DM and WCM from an API perspective, so WCM is not always a subset of DM functionality. Some features are only available in WCM.

Main differences:

  • DM uses a proprietary XML-based description of the content model, while WCM uses XML schema. Main idea – not to have a mix between two models.
  • Data entered into a WCM web form is saved as XML that conforms to the XSD defined by the user. There is no similar facility for capturing data as XML within DM.
  • XSLT (or Freemaker) can be used to transform WCM data into other formats. In DM, no such functionality exist out-of-the-box.
  • WCM does not allow configuration of rules (trigger actions against newly-added, updated or deleted documents).
  • DM allows assigning users and groups to roles at folder and file level. WCM only allows doing that on a project level, no lower, but can be implemented by writing custom code using API.

General advice on choosing between DM and WCM:

Choose WCM if:

  • Authors are comfortable with Alfresco Web Client and Web Forms
  • Minimal time to be spent on presentation tier
  • Need the ability to rollback change sets
  • Only need to link content to basic URLs
  • Need to have a staging environment
  • Simple workflow is sufficient

Choose DM if:

  • Workflow must be exposed via the portal
  • Developers are experienced with XML/XSLT, WYSIWYG editors and jBPM
  • Can spend time upfront designing a robust presentation tier
  • Custom solution is desired and the overall solution is simple

References

Understanding the differences between Alfresco repository implementations
Alfresco WCM or DM: What is the best choice for your enterprise portal? by . Also posted on my website